
Smartphone, camera or dedicated device: there are three main ways to take photos in dermoscopy. They do not cost the same, do not take the same time and do not give the same images. The right choice depends mainly on your practice: an occasional photo to ask for an opinion, or regular photographic follow-up of your patients.
Key points in 30 seconds
- Smartphone + dermatoscope: the simplest and cheapest solution. Ideal for occasional documentation and sending an image.
- DSLR or mirrorless camera + dermatoscope: the best image quality, at the cost of bulkier equipment and some knowledge of photography.
- Dedicated camera (Casio DZ-D100): excellent image quality, all-in-one, fast and reproducible. Designed for regular follow-up.
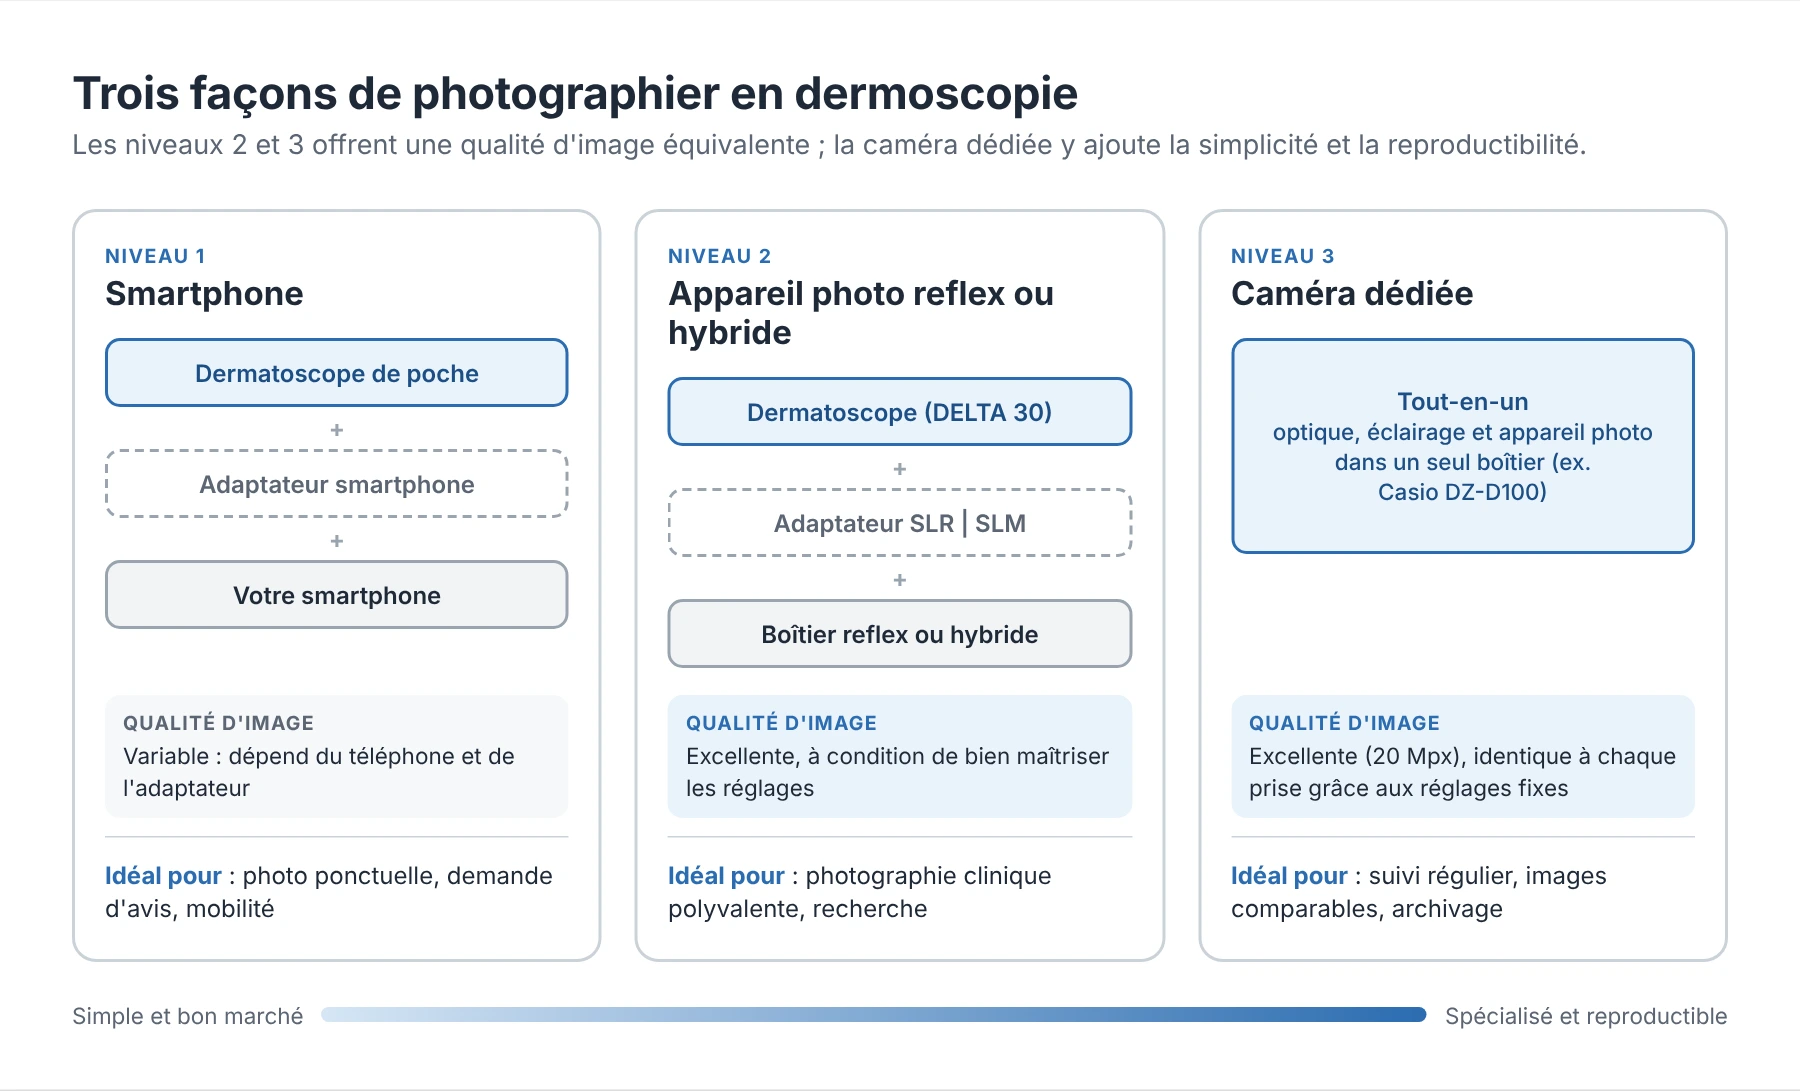
Level 1: the smartphone
A pocket dermatoscope attached to the phone with an adapter: this is the solution most practitioners already use. It is simple, inexpensive and validated by studies for triaging lesions and asking for an opinion.
Its limits are well known: colors that vary from one phone to another, automatic settings that are hard to control, photos that end up on a personal phone. They matter little for an occasional photo, much more for follow-up over time.
Adapters, image quality, studies and good practice: everything is covered in our article Dermatoscope on a smartphone: adapters, image quality and limits.
Level 2: the DSLR or mirrorless camera
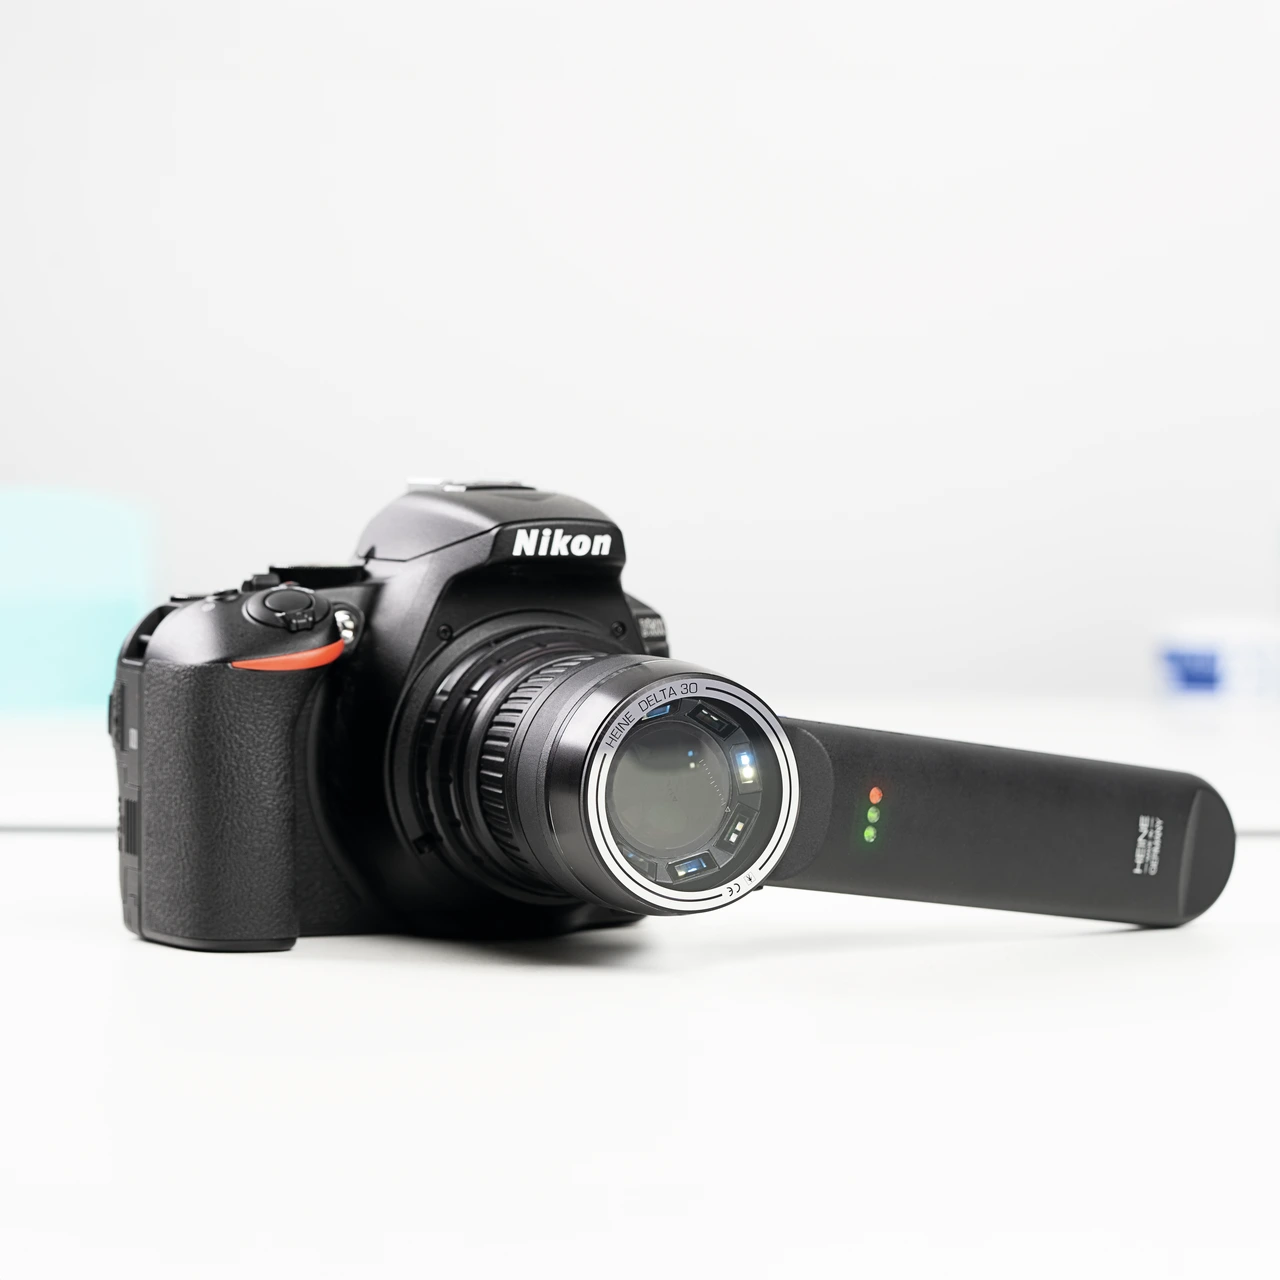
This is the solution that gives the best image quality. The same dermatoscope is attached in front of a digital camera with interchangeable lenses, instead of the smartphone.
At HEINE, two camera adapters connect the DELTA 30, 30 Pro, 30 UV or DELTAone to a DSLR or a mirrorless camera (DSLM):
- The SLR | SLM adapter aims for the best optical quality and the highest resolution. It comes in a bayonet version for certain Canon, Nikon and Sony bodies, or in a universal T2 version, which also requires a T2 ring suited to the body (
- The SLR | SLM flow adapter favors ease of use: the lens stays on the camera, you switch from clinical to dermoscopic photos without disassembling anything, and autofocus remains usable.
The advantages
- The best resolution: a large sensor captures more detail and lets you zoom in on the image afterwards.
- Controlled settings: white balance, sensitivity and exposure are set manually and stay the same from one photo to the next. HEINE provides recommended settings based on the color temperature of the dermatoscope.
- RAW format on most bodies, with no automatic image processing.
The constraints
- Size and weight: the setup is handled with two hands and is awkward to carry.
- Cost: camera body, adapter and possibly a T2 ring, in addition to the dermatoscope.
- Some photography practice to set the camera up correctly.
- Images to transfer from the memory card to secure storage, as with a smartphone.
This option is mainly for dermatologists with a real photography routine, clinical photographers and research.
Level 3: the dedicated camera, example of the Casio DZ-D100
For photos, there is no longer any need for a separate dermatoscope: the optics, the lighting and the camera are combined in a single body designed for dermatology. This is the most suitable solution when photography becomes routine: follow-up of patients with multiple nevi, comparison over time, archiving.
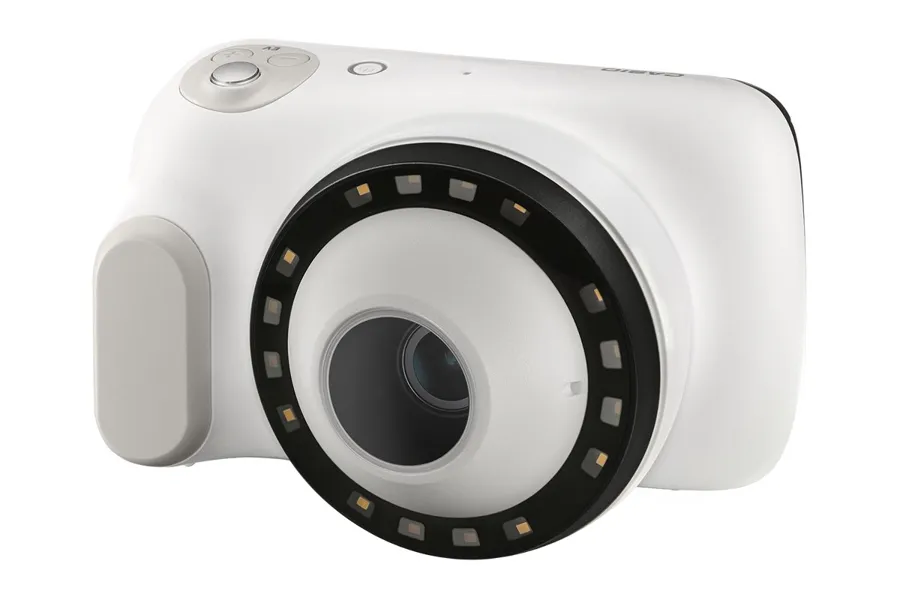
The DERMOCAMERA DZ-D100 by Casio was developed with Chiba University for this specific use:
- Overview and dermoscopic view with the same device, without changing lenses.
- One shot for three images: polarized, non-polarized and UV.
- Fixed settings in dermoscopy mode (fixed ISO sensitivity, built-in LED lighting): photos remain comparable from one consultation to the next.
- A scale displayed on the screen to measure the lesion immediately.
- Images that do not go through a personal phone: transfer by Wi-Fi, USB or SD card to the D'z IMAGE Viewer software on a computer.
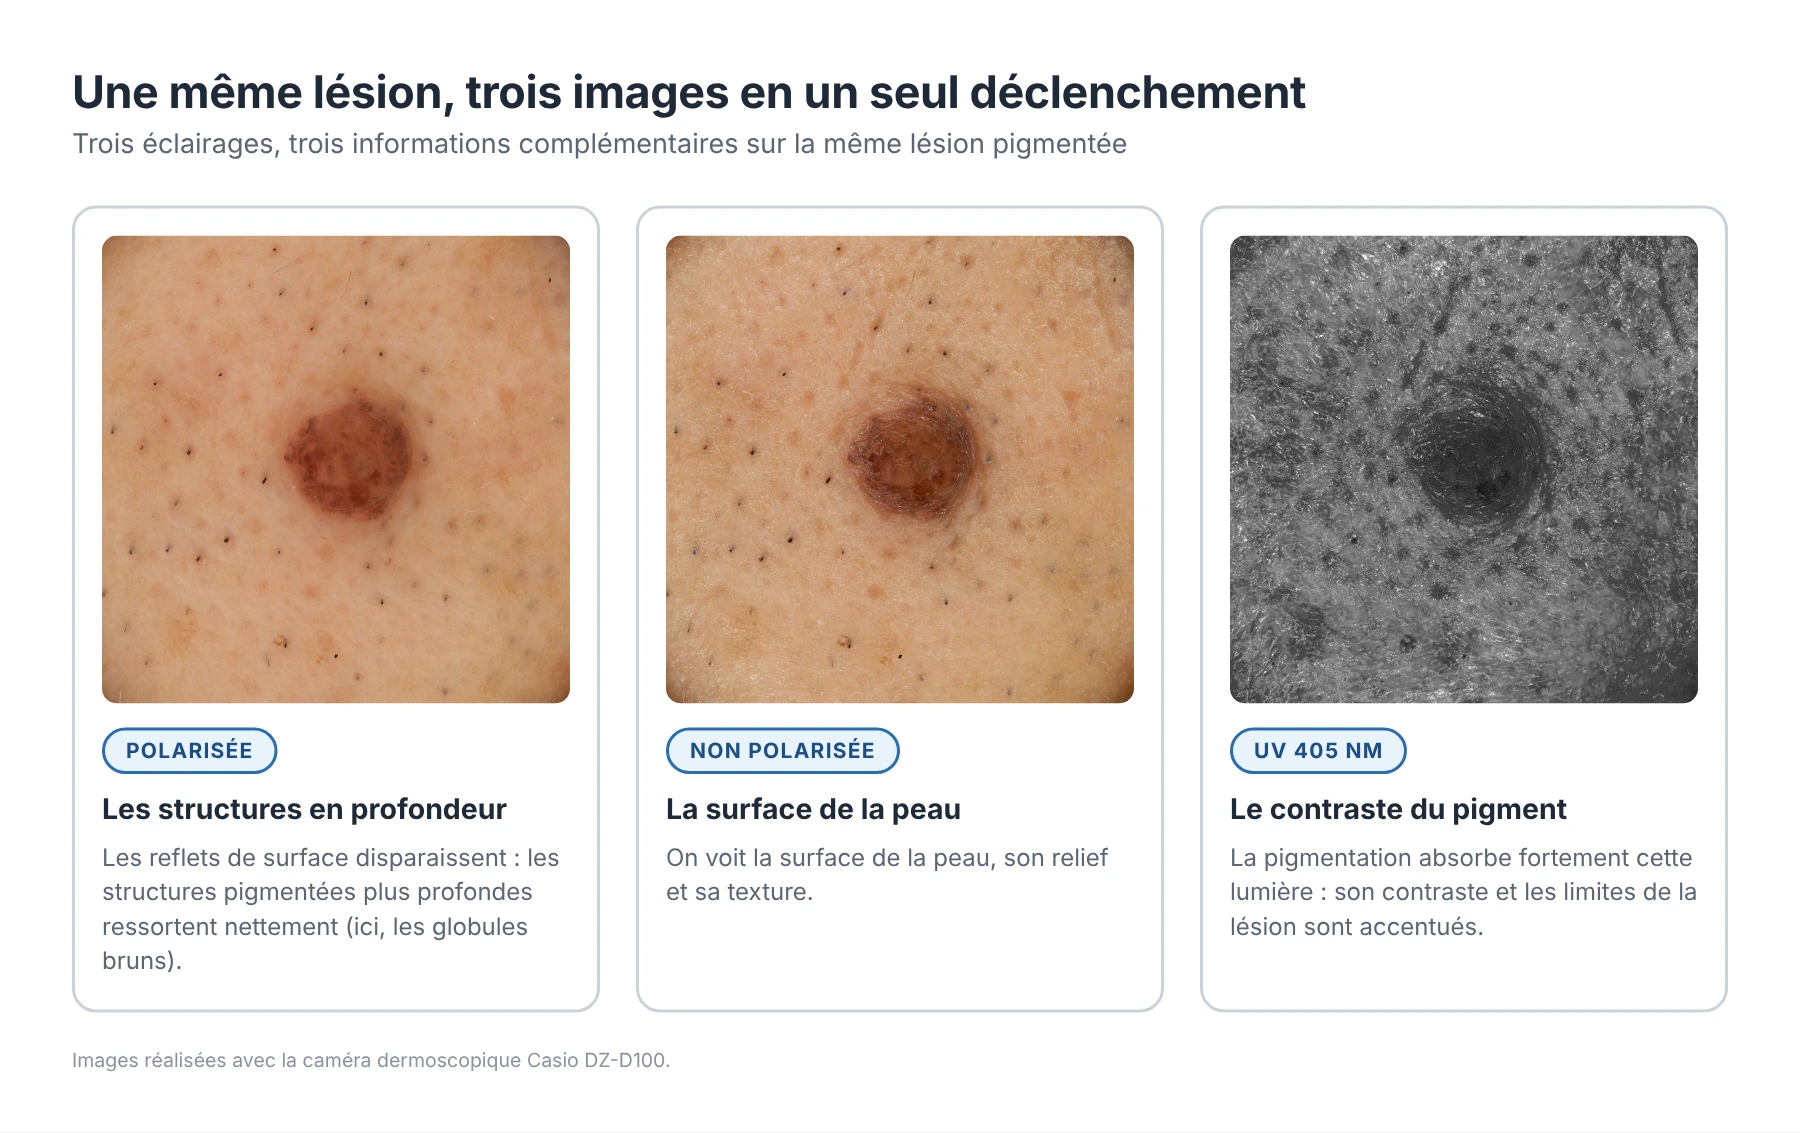
The comparison
No solution is best across the board: the smartphone wins on simplicity, the camera on pure quality, the dedicated device on consistency.
Smartphone + adapter | DSLR / mirrorless + flow adapter | DSLR / mirrorless + SLR | SLM adapter | Casio DZ-D100 | |
|---|---|---|---|---|
Ideal use | Occasional photo, request for an opinion | Daily clinical and dermoscopic photos, high quality | Research, publication, maximum quality | Regular follow-up, archiving, comparison over time |
Resolution and fine detail | ●●○ | ●●● | ●●● | ●●● |
Color accuracy and stability | ●○○ | ●●● | ●●● | ●●● |
Clinical and dermoscopic view with the same device | ●●● | ●●● | ●○○ | ●●● |
Several light modes in one shot | ●○○ | ●○○ | ●○○ | ●●● |
Speed and ease of use | ●●● | ●●○ | ●○○ | ●●● |
Portability and size | ●●● | ●○○ | ●○○ | ●●○ |
Budget (in addition to the dermatoscope) | € | €€ | €€€ | €€€ |
●●● very suitable · ●●○ suitable · ●○○ not very suitable.
Which solution is right for you?
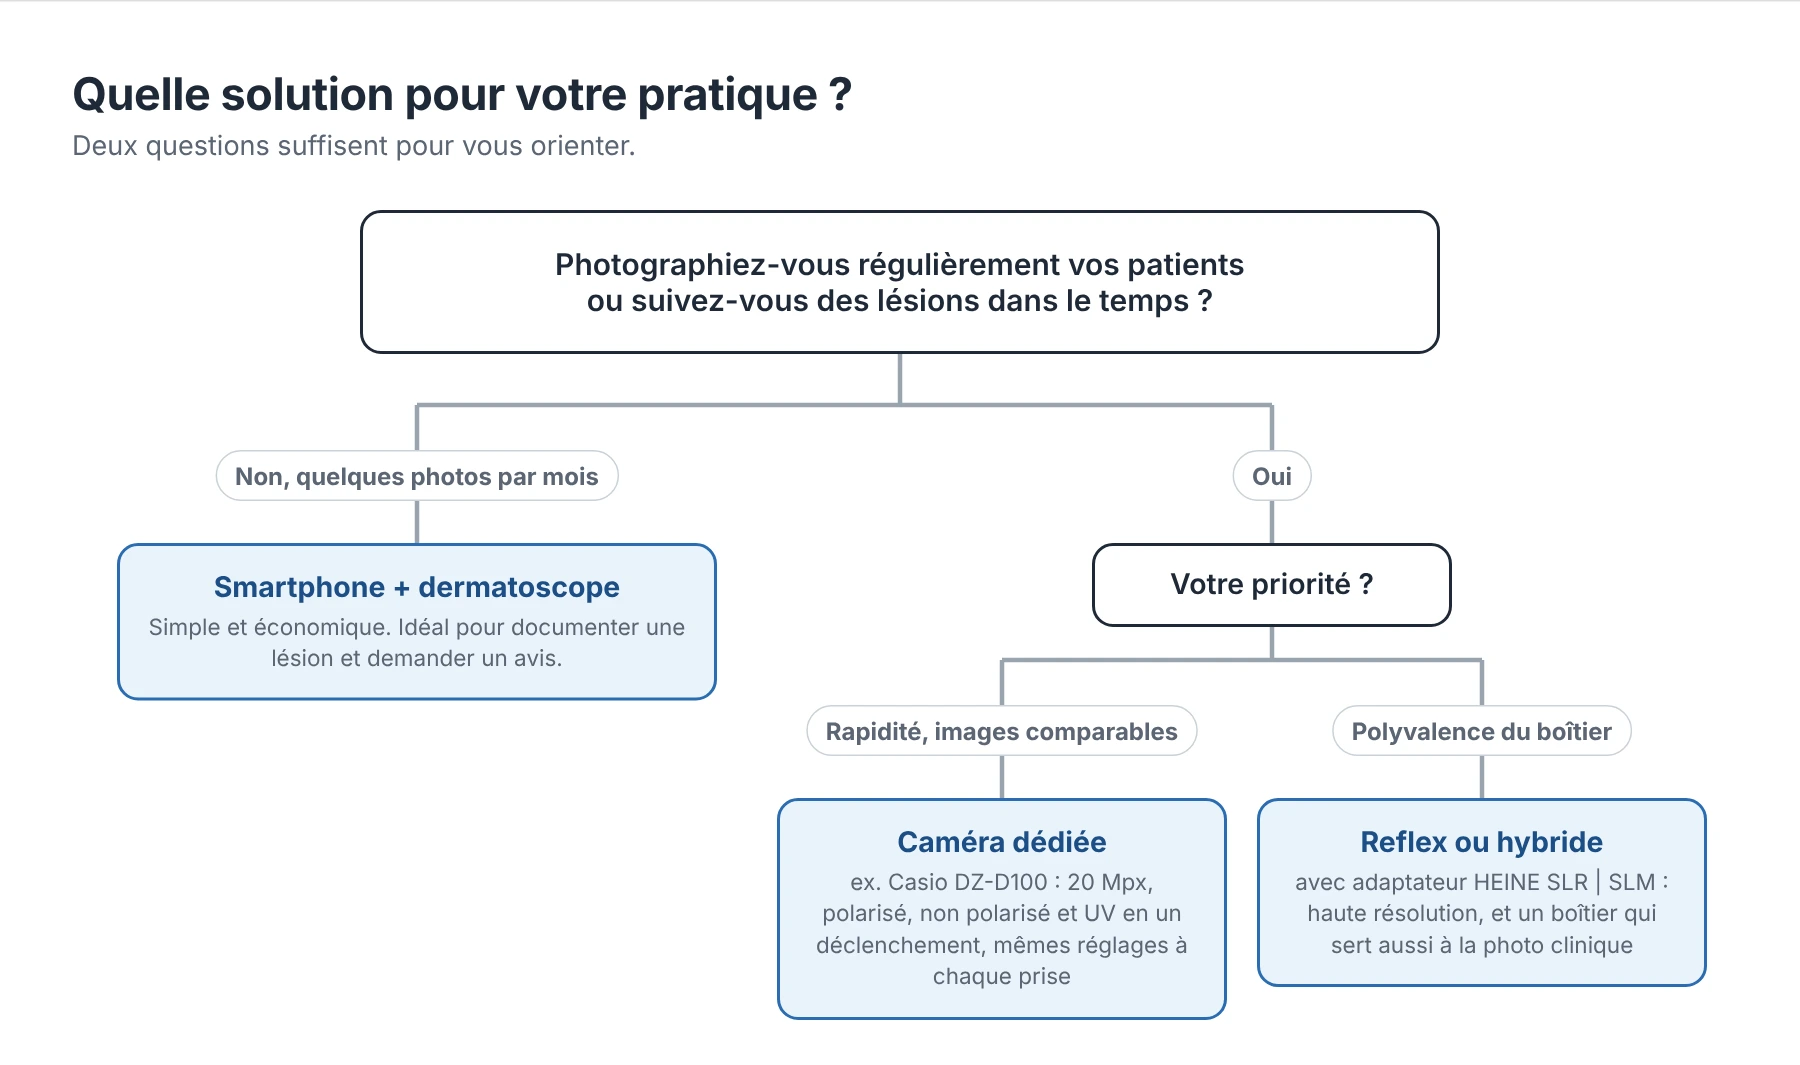
- You photograph a few lesions a month to ask for an opinion (general practitioner, podiatrist…): a smartphone is enough, provided you have a good dermatoscope and an adapter suited to your phone.
- You regularly follow patients and compare their lesions over time (dermatologist, screening center, research, publication, clinical photography): a DSLR or mirrorless camera with the HEINE SLR | SLM adapter if you have some photography skills. A dedicated camera such as the DZ-D100 will save you time and give images that are comparable from one consultation to the next.
Once the photo has been taken, it still has to be transferred, archived and sometimes sent to a colleague under proper conditions. That will be the subject of a future article.
References
- Cugmas B, Pernuš F, Likar B. Color constancy in dermatoscopy with smartphone. Proc SPIE 10592, Biophotonics—Riga 2017.